p.3
p.9
p.15
p.21
p.31
p.39
p.45
p.51
Actual Stress Analysis of Welded Part Using a Quantum Beam Hybrid Method
Abstract:
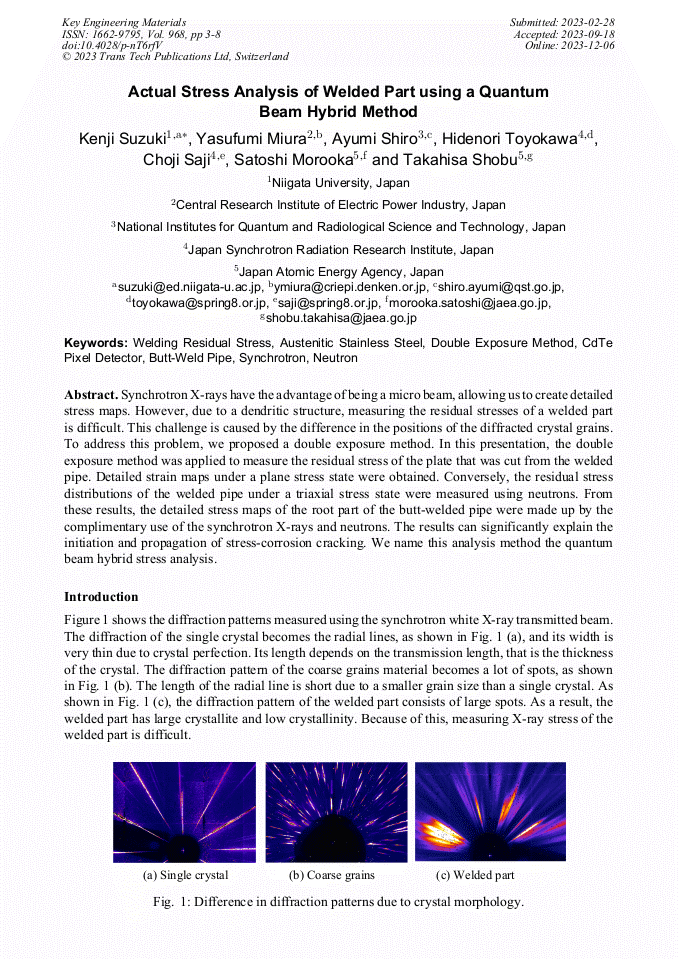
Synchrotron X-rays have the advantage of being a micro beam, allowing us to create detailed stress maps. However, due to a dendritic structure, measuring the residual stresses of a welded part is difficult. This challenge is caused by the difference in the positions of the diffracted crystal grains. To address this problem, we proposed a double exposure method. In this presentation, the double exposure method was applied to measure the residual stress of the plate that was cut from the welded pipe. Detailed strain maps under a plane stress state were obtained. Conversely, the residual stress distributions of the welded pipe under a triaxial stress state were measured using neutrons. From these results, the detailed stress maps of the root part of the butt-welded pipe were made up by the complimentary use of the synchrotron X-rays and neutrons. The results can significantly explain theinitiation and propagation of stress-corrosion cracking. We name this analysis method the quantum beam hybrid stress analysis.
Info:
Periodical:
Pages:
3-8
DOI:
Citation:
Online since:
December 2023
Price:
Сopyright:
© 2023 Trans Tech Publications Ltd. All Rights Reserved
Share:
Citation:


