The X-Ray Diffraction Characteristics of Different Materials

Article Preview

Abstract:

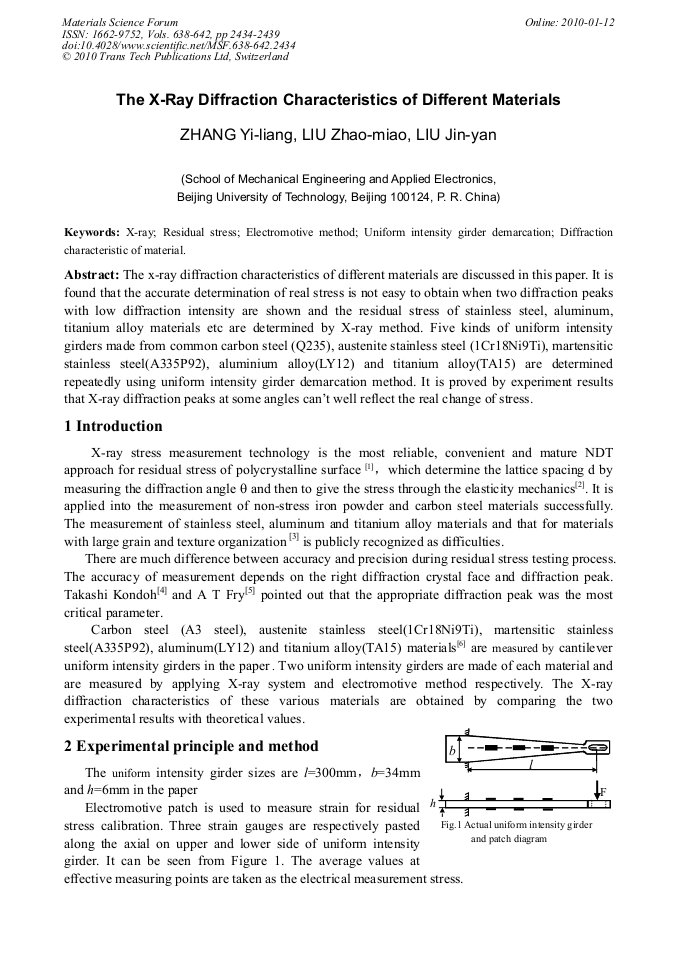
The x-ray diffraction characteristics of different materials are discussed in this paper. It is found that the accurate determination of real stress is not easy to obtain when two diffraction peaks with low diffraction intensity are shown and the residual stress of stainless steel, aluminum, titanium alloy materials etc are determined by X-ray method. Five kinds of uniform intensity girders made from common carbon steel (Q235), austenite stainless steel (1Cr18Ni9Ti), martensitic stainless steel(A335P92), aluminium alloy(LY12) and titanium alloy(TA15) are determined repeatedly using uniform intensity girder demarcation method. It is proved by experiment results that X-ray diffraction peaks at some angles can’t well reflect the real change of stress.

You might also be interested in these eBooks

Info:

Periodical:

Materials Science Forum (Volumes 638-642)

Pages:

2434-2439

Citation:

Online since:

January 2010

Export:

Price:

Permissions CCC:

Permissions PLS:

Сopyright:

© 2010 Trans Tech Publications Ltd. All Rights Reserved

Share:

Citation:

[1] CHEN Yu-an, ZHOU Shang-qi. The state of the art of the study on residual stress measurement by x-ray analysis [J]. NDT. 2001, 23(1): 19~22. (in Chinese).

Google Scholar

[2] Sun Yan, Wang Qingming. Research status of residential stress measurement [J]. Journal of Shanghai Dianji University. 2006, 9 (4): 6~10.

Google Scholar

[3] Petroleum machinery institute of Lanzhou. Pressure vessel inspection and nondestructive testing [J]. P ublishing House of Chemical Industry. 2006: 34~42.

Google Scholar

[4] Takashi Kondoh, Tokimasa, Toshihiko Sasaki, Yukio Hirose. X-Ray stress measurement for titanium alumi nide intermetallic compound [J]. Advances in X-ray analysis. 2000, 43: 107~116.

Google Scholar

[5] A T Fry, F A Kandil. A Study of Paramaters affecting the quality of residual stress measurements usi ng XRD [J]. Materials Science Forum. 2002, 404~407: 579~586.

DOI: 10.4028/www.scientific.net/msf.404-407.579

Google Scholar

[6] WANG Wei-rong. A study of the measuring methods of residual welding stresses [J]. Hanjie Xuebao. 1989, 10(3): 181~187. (in Chinese).

Google Scholar

[7] A. Thomas, B. Pathiraj, P. Veron. Feature tests on welds components at higher temperatures-Material p erformance and residual stress evaluation [J]. Engineering Fracture Mechanics. 2007, 969~979.

DOI: 10.1016/j.engfracmech.2006.08.017

Google Scholar

[8] Bahadur,A. Ravi Kumar, B.; Seshu Kumar,A.; Sarkar G.G.; Rao J.S. Development and comparison of residual stress measurement on welds by various methods[J]. Materials Science and Technology. 2004, 20: 261~269.

DOI: 10.1179/026708304225012332

Google Scholar

[9] GAO Yu-kui. Microstructure changes and residual stresses of each phase caused by shot peening in 304 austenitic stainless steel [J]. Journal of aeronautical materials. 2004, 24(4): 18~21. (in Chinese).

Google Scholar

[10] DONG Ping, CHEN Yong-zhong, BAI Chao-mao. Measurement of x-ray stress constant of beryllium [J]. Rare metal material sand engineering. 2004, 33(4): 445~448. (in Chinese).

Google Scholar